How to Master the Art of Contouring

Contour and Highlight Product Suggestions
Contouring has become a must-have technique in makeup routines, helping you define and sculpt your facial features. With the right products and application techniques, contouring can create dimension, enhance your natural features, and give your face a more polished, professional look. Here’s a guide on how to master the art of contouring along with some product recommendations.
Step 1: Choose the Right Contour Products
The key to effective contouring is using the right products that suit your skin tone and type. There are two main types of contouring products: powders and creams.
- Powder Contours: Best for oily skin types or those looking for a matte finish.
- Cream Contours: Ideal for dry or normal skin types, as they provide a dewy, natural look.
Recommended Contour Products:
- Fenty Beauty Match Stix Matte SkinstickThis creamy contour stick blends seamlessly and is available in various shades to suit all skin tones. The formula is lightweight and easy to build for a more natural or dramatic look.
- Anastasia Beverly Hills Contour KitA cult favorite, this powder contour kit offers six shades, perfect for creating a sculpted, defined look. It’s versatile and buildable, making it suitable for all makeup styles.
Step 2: Choose Your Highlighting Products
Highlighters are essential for bringing light to your face and complementing the contours. The goal is to emphasize the high points of your face like the cheekbones, nose, brow bones, and cupid's bow. You can choose between powder, cream, or liquid highlighters based on your skin type and desired effect.
Recommended Highlighting Products:
- Becca Shimmering Skin Perfector Pressed HighlighterKnown for its ultra-creamy texture and high-impact glow, this product provides a natural, radiant finish that complements any contour.
- MAC Mineralize Skinfinish HighlighterA baked powder with a soft sheen, this highlighter gives a subtle and healthy glow, perfect for everyday makeup looks.
Step 3: Tools of the Trade
For a flawless application, use the right tools:
- Contour Brush: For precise application of powders.
- Beauty Blender or Sponge: Ideal for blending cream products seamlessly.
- Fan Brush: Perfect for a light, even application of highlighter.
Step 4: Application Technique
Contour Application:
- Forehead: Apply contour along your hairline to shorten the appearance of the forehead.
- Cheekbones: Suck in your cheeks and apply the contour just below your cheekbones, blending upward.
- Jawline: Define your jaw by applying contour under your jawline and blending downward.
- Nose: Lightly apply contour along the sides of your nose to slim its appearance.
Highlight Application:
- Cheekbones: Apply highlighter to the top of your cheekbones to create a lifted effect.
- Nose: Add a small amount to the bridge and tip of your nose for a sleek, defined look.
- Brow Bone: Accentuate the area just below your eyebrows to open up the eyes.
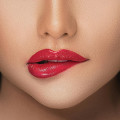
- Cupid’s Bow: Add a touch of highlighter to the top of your upper lip to make it appear fuller.
Step 5: Blend, Blend, Blend
The secret to a flawless contour and highlight is blending. Use a damp beauty sponge or brush to soften any harsh lines, ensuring the product melts into your skin for a natural look.
Final Thoughts
Mastering the art of contouring can take your makeup game to the next level. With the right products and techniques, you can sculpt and highlight your face, giving it dimension and definition. Whether you're going for a subtle everyday look or full glam, contouring adds that extra touch of sophistication.
© 2024 Flair Hill. All rights reserved. This content is protected by copyright and may not be reproduced or distributed without permission.

















Leave a Comment